
Blade Painting Instructions
Scullers who row their own boats and use personal oars are expected to paint them with club design and colors within 2 weeks of rowing on the Charles. This requirement is per State Police regulations and Charles River Rules. Contact the club captain if you think you are an exception. The official club colors are royal blue and white. (From the Code of Conduct)
Club members may also be asked to perform oar painting duties as part of their Team’s Boat Maintenance Tasks or as part of Volunteer Boat and Oar Maintenance Work Parties.
Step 1: Sanding, Priming and Painting Blades White
(1.5-2hrs)
Any blade, old or new, needs to be primed before it can be painted. Concept2 offers detailed video instructions on how to best prep their blades for paining. Even if brand-new blades are already white. The RBC Blue won’t stick to the blade unless it’s properly primed and painted white first.
Below are the Concept2 website’s general instructions on how to prepare and paint blades. If you prefer to watch a video, it can be found here.

New blades are finished with an abrasion-resistant epoxy powder coat system at the Concept2 factory. With appropriate preparation, this finish is compatible with most other finish coats such as acrylic enamel, acrylic urethane, urethane, or epoxy paint. If you would like to change your blade color or apply additional paint or designs, prepare your blades for painting as follows:
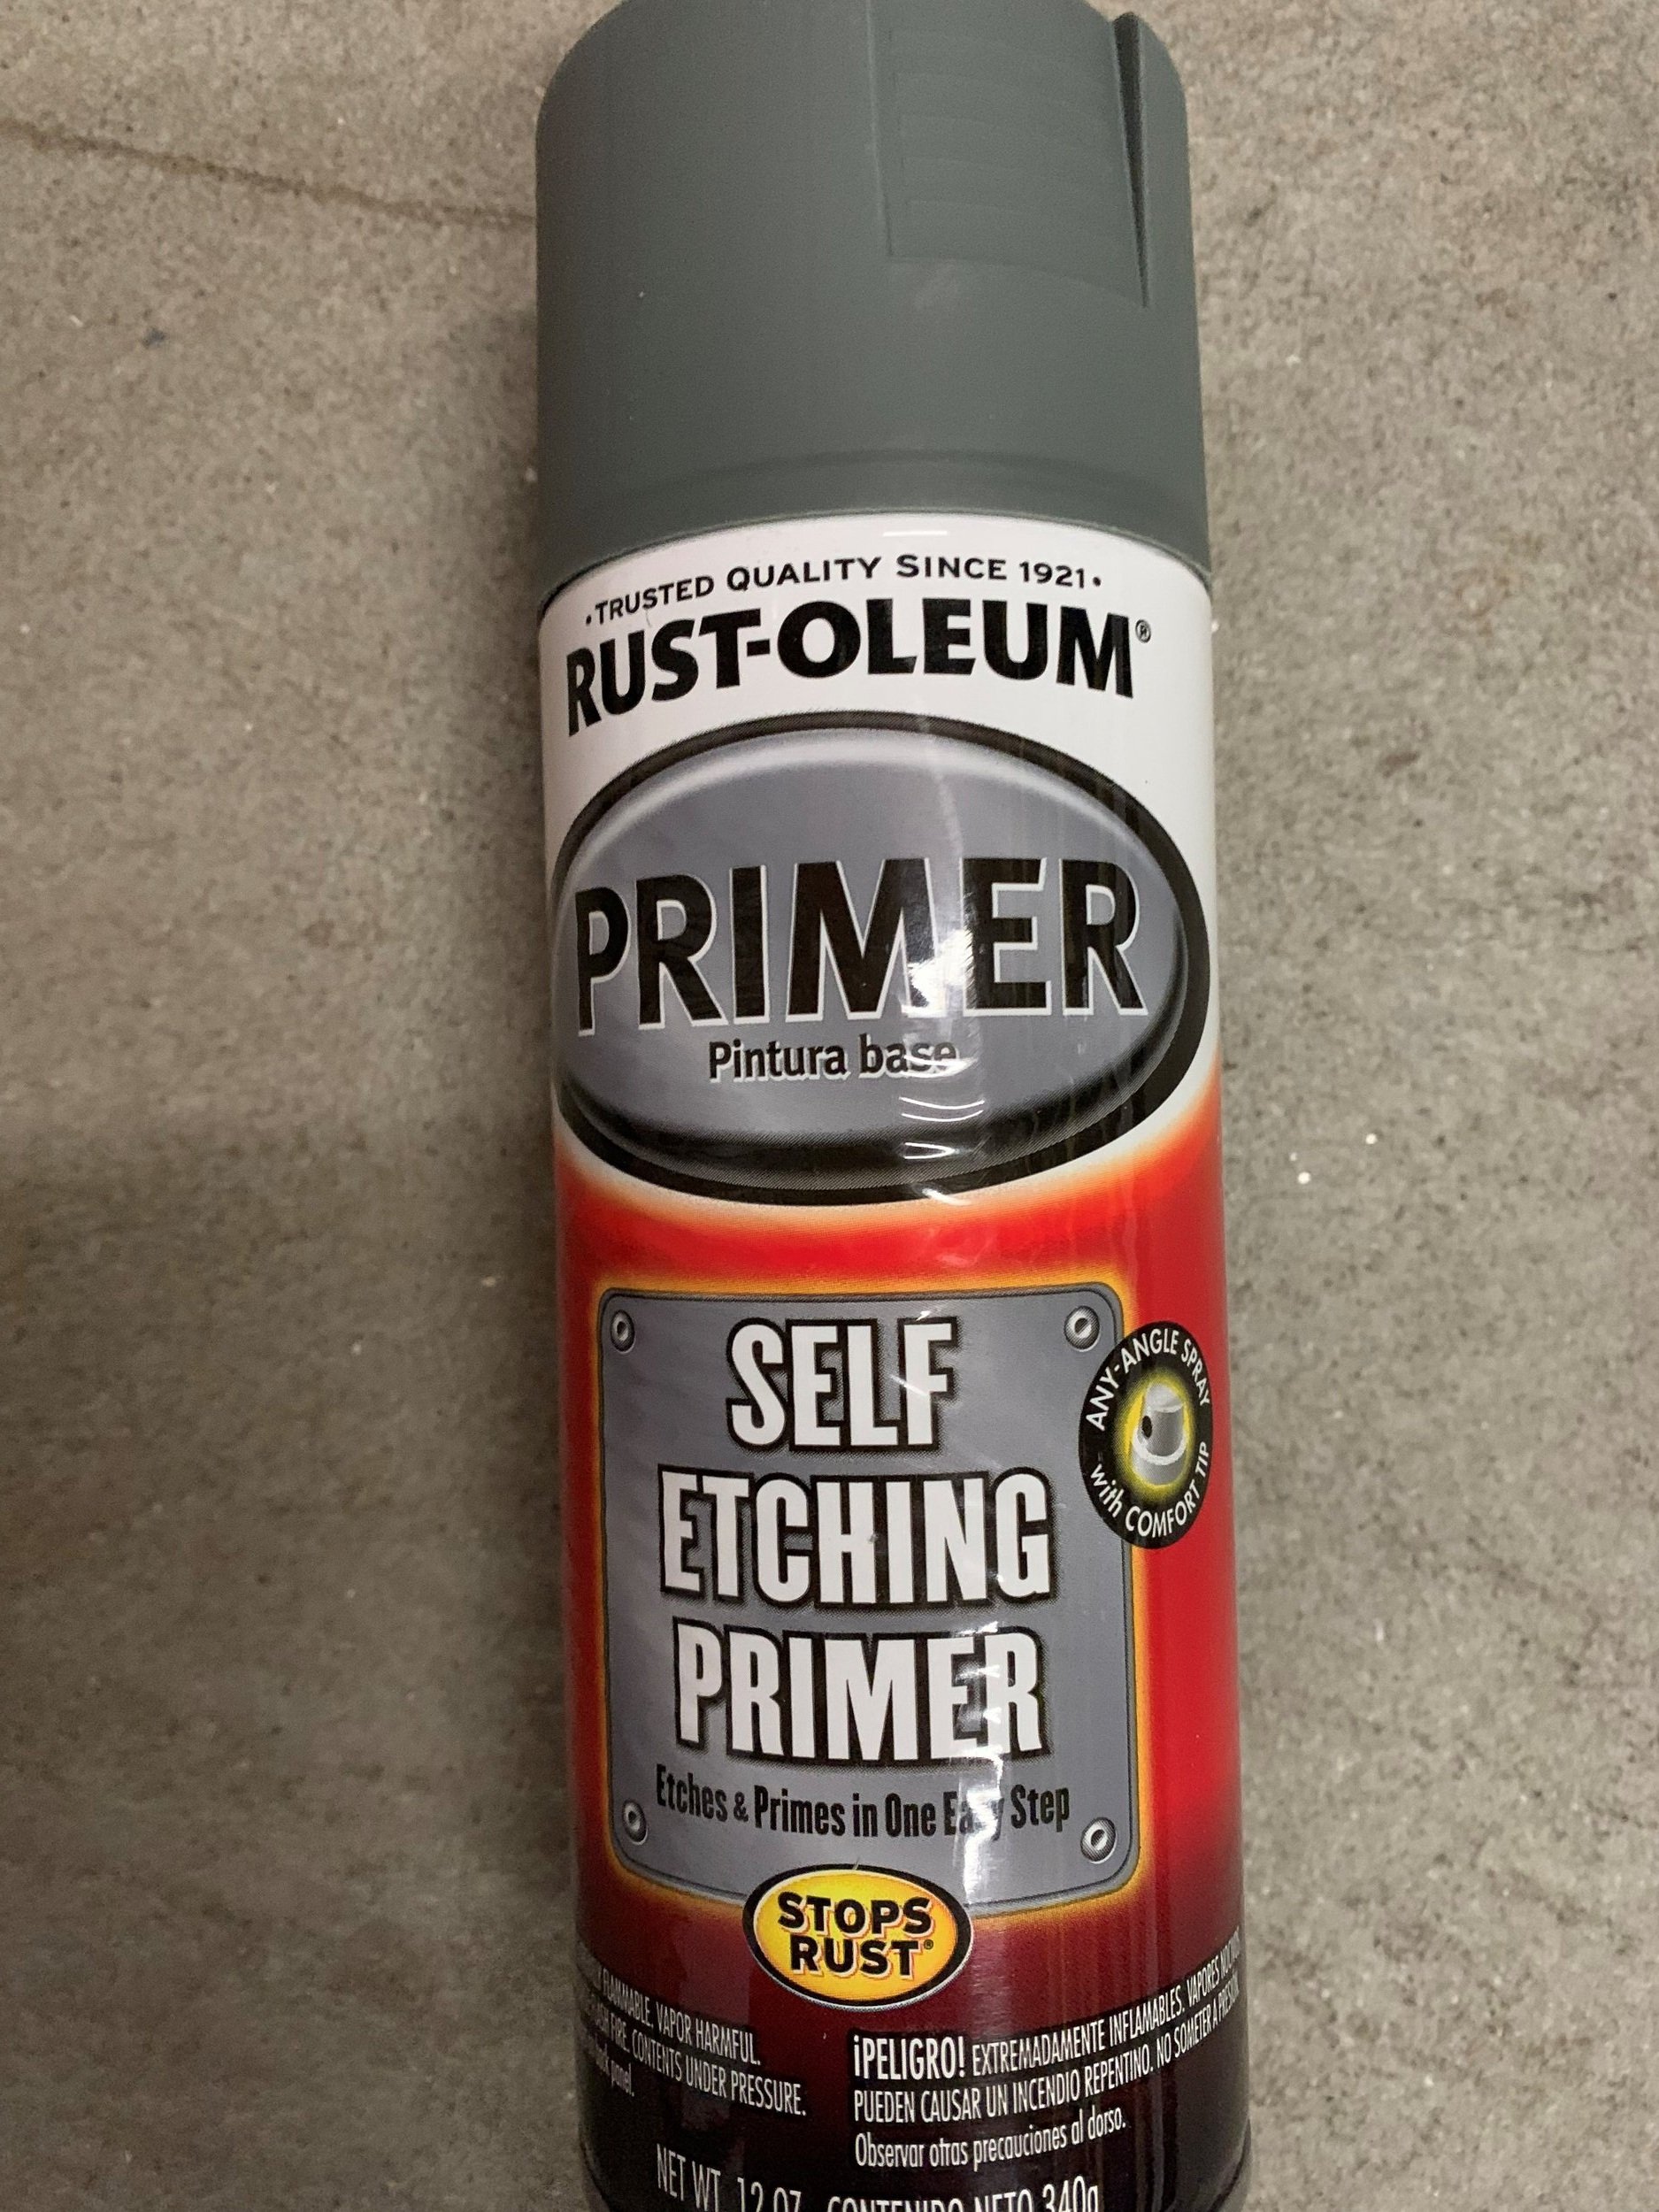
Using gray spray primer, apply a light dusting, or "guide coat," of primer on both sides of the blade from a distance of 18–20 inches. This will act as a visual guide when sanding and will expose any low spots or imperfections during the surface prep. Allow to dry for 5–10 minutes.
With 220 grit paper, hand sand or use an orbital sander to sand both sides of the blade to a dull finish. (An orbital sander will provide the best prep with the least amount of effort.) IMPORTANT: Proper paint adhesion requires that the blades are thoroughly sanded. To sand by hand: Start sanding in a corner of the blade. Work your way across the blade surface removing the previously applied guide coat. Sand the other side. To sand with an orbital sander: Sand the back surface of the blade up to and around the cone area. Hand sand the cone area. Sand the front of the blade.
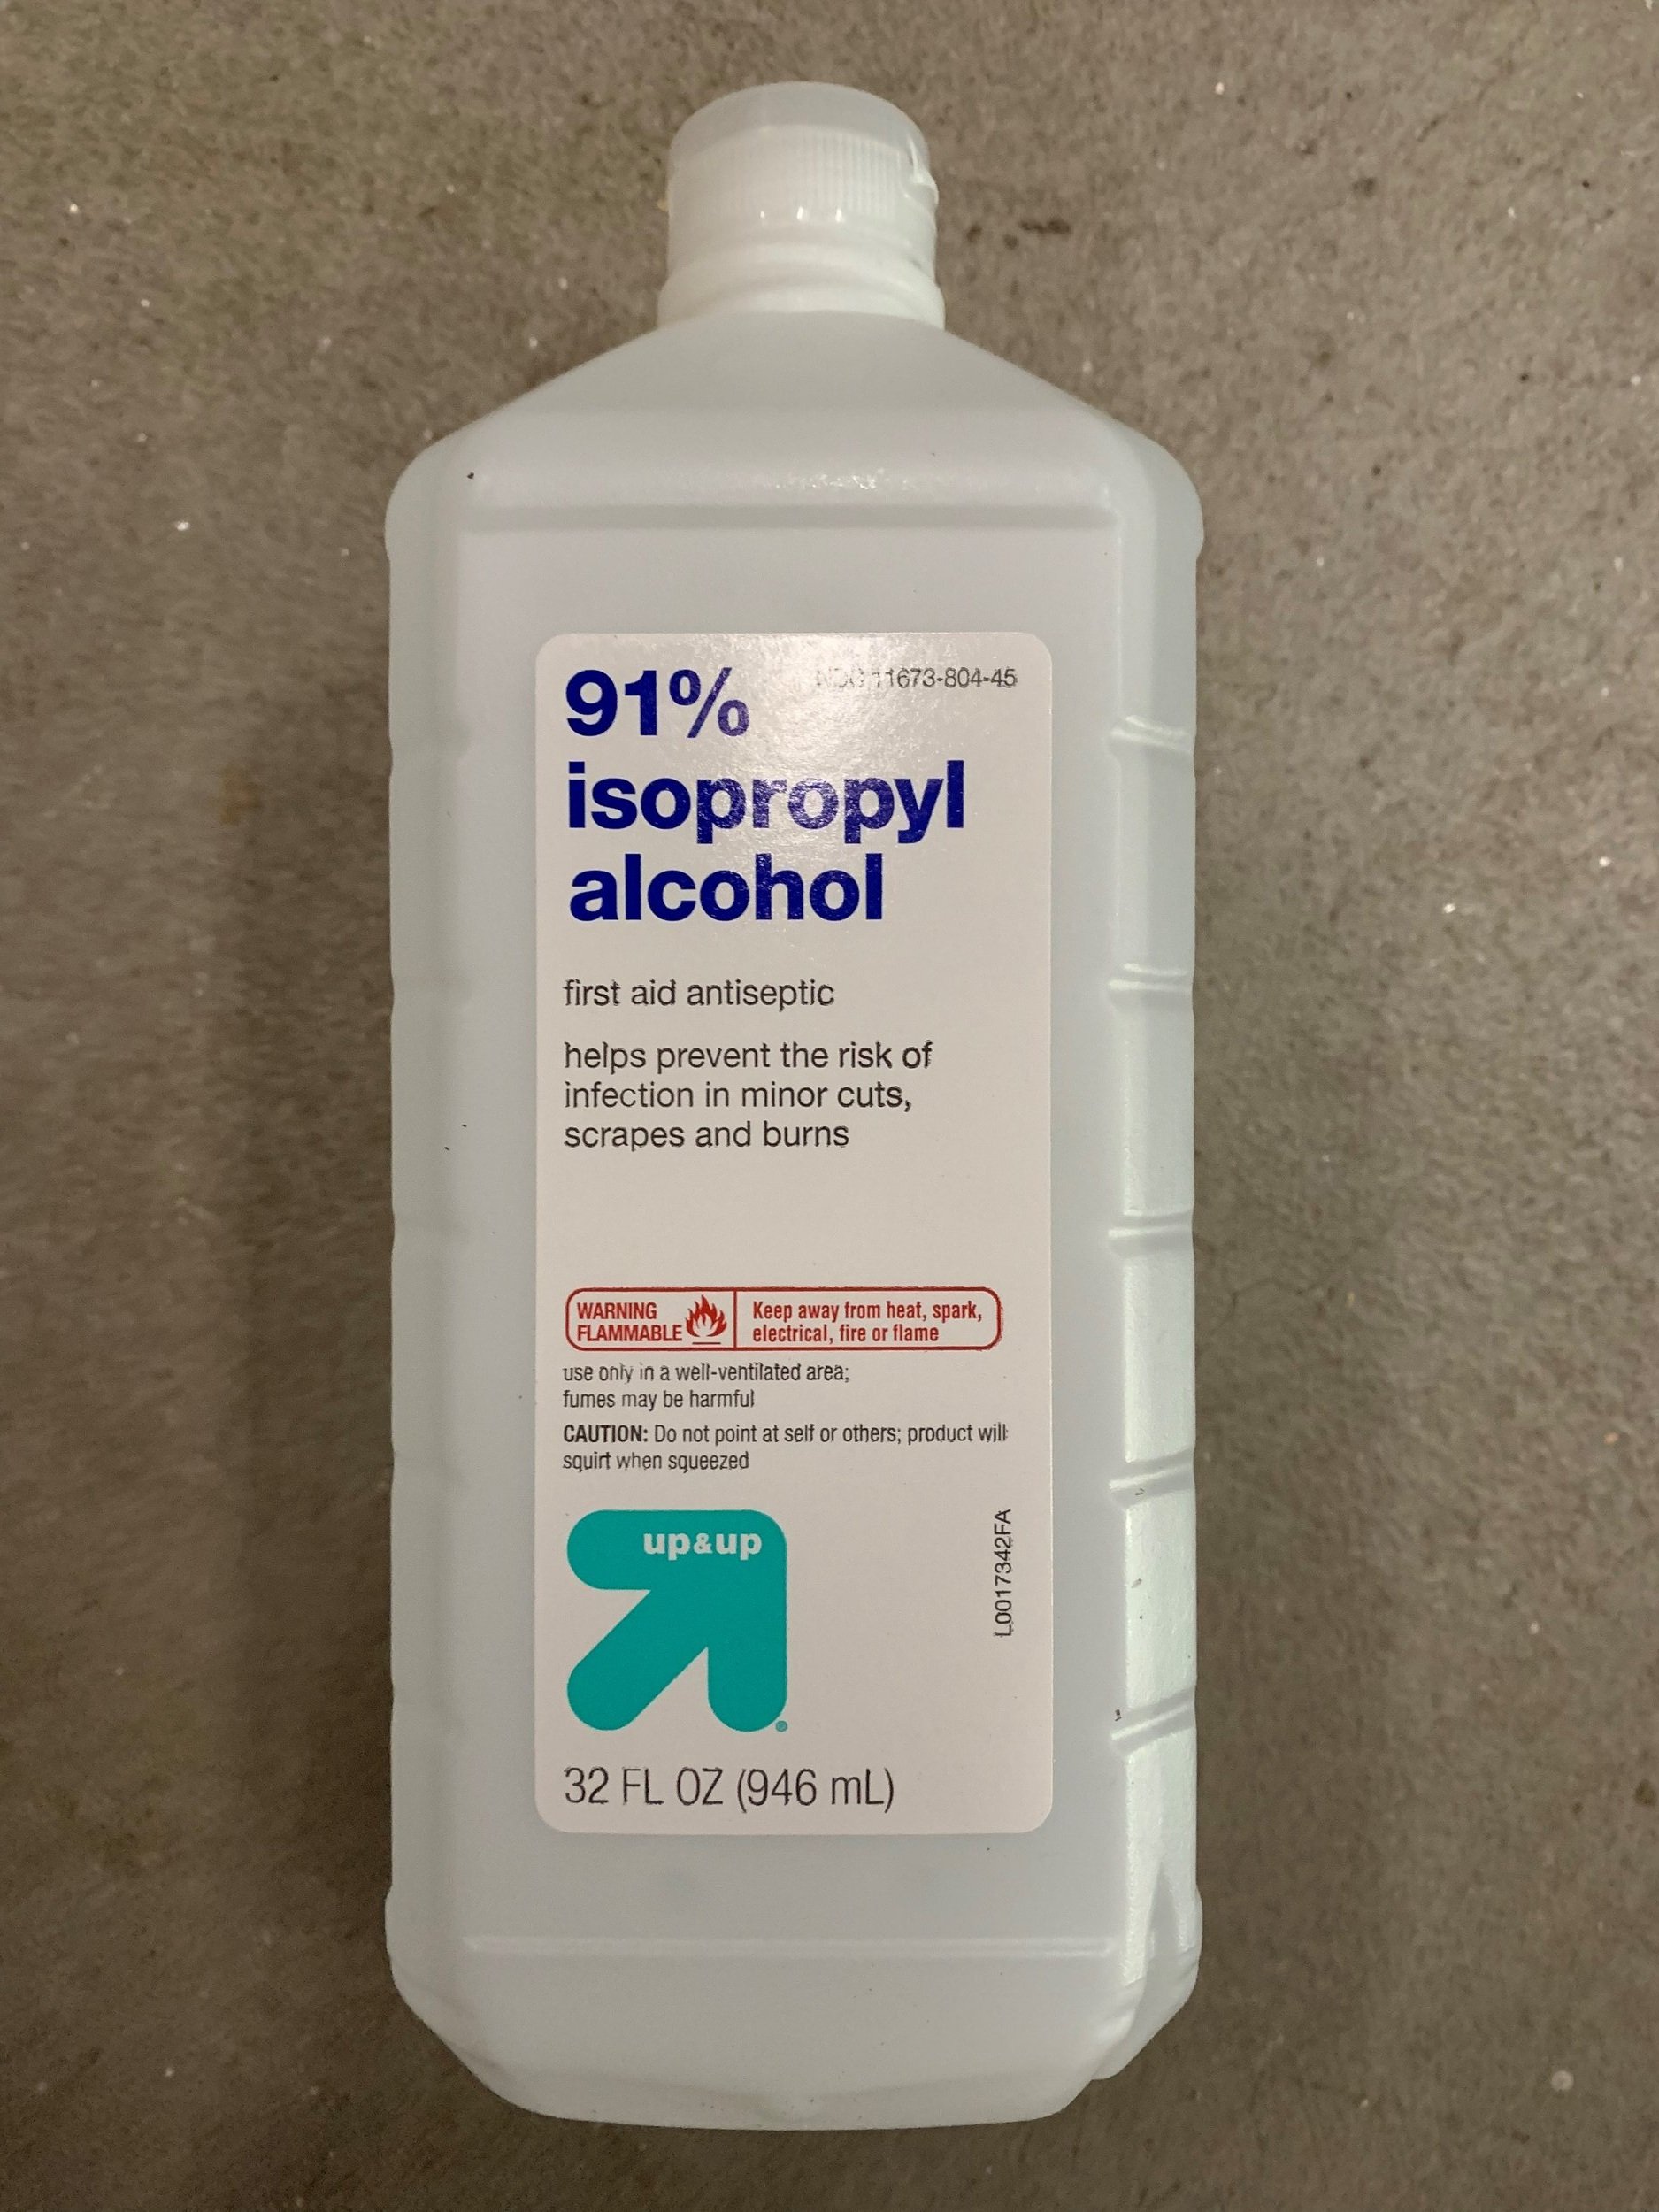
Using rubbing alcohol on a lint-free cloth, wipe both sides of the blade to remove the sanding dust. Allow the alcohol to evaporate completely. IMPORTANT: Before priming and painting your blade:
Mix and apply the primer/paint per the manufacturer’s instructions (see paint recommendations).
Test the primer/paint on a small portion of the sanded blade to ensure that it does not bubble or easily scrape or peel off.
DO NOT paint the Vortex Edge.
Prime the blade with a primer that is compatible with the finish coat you are using. Follow the instructions from the primer manufacturer to prepare the primer.
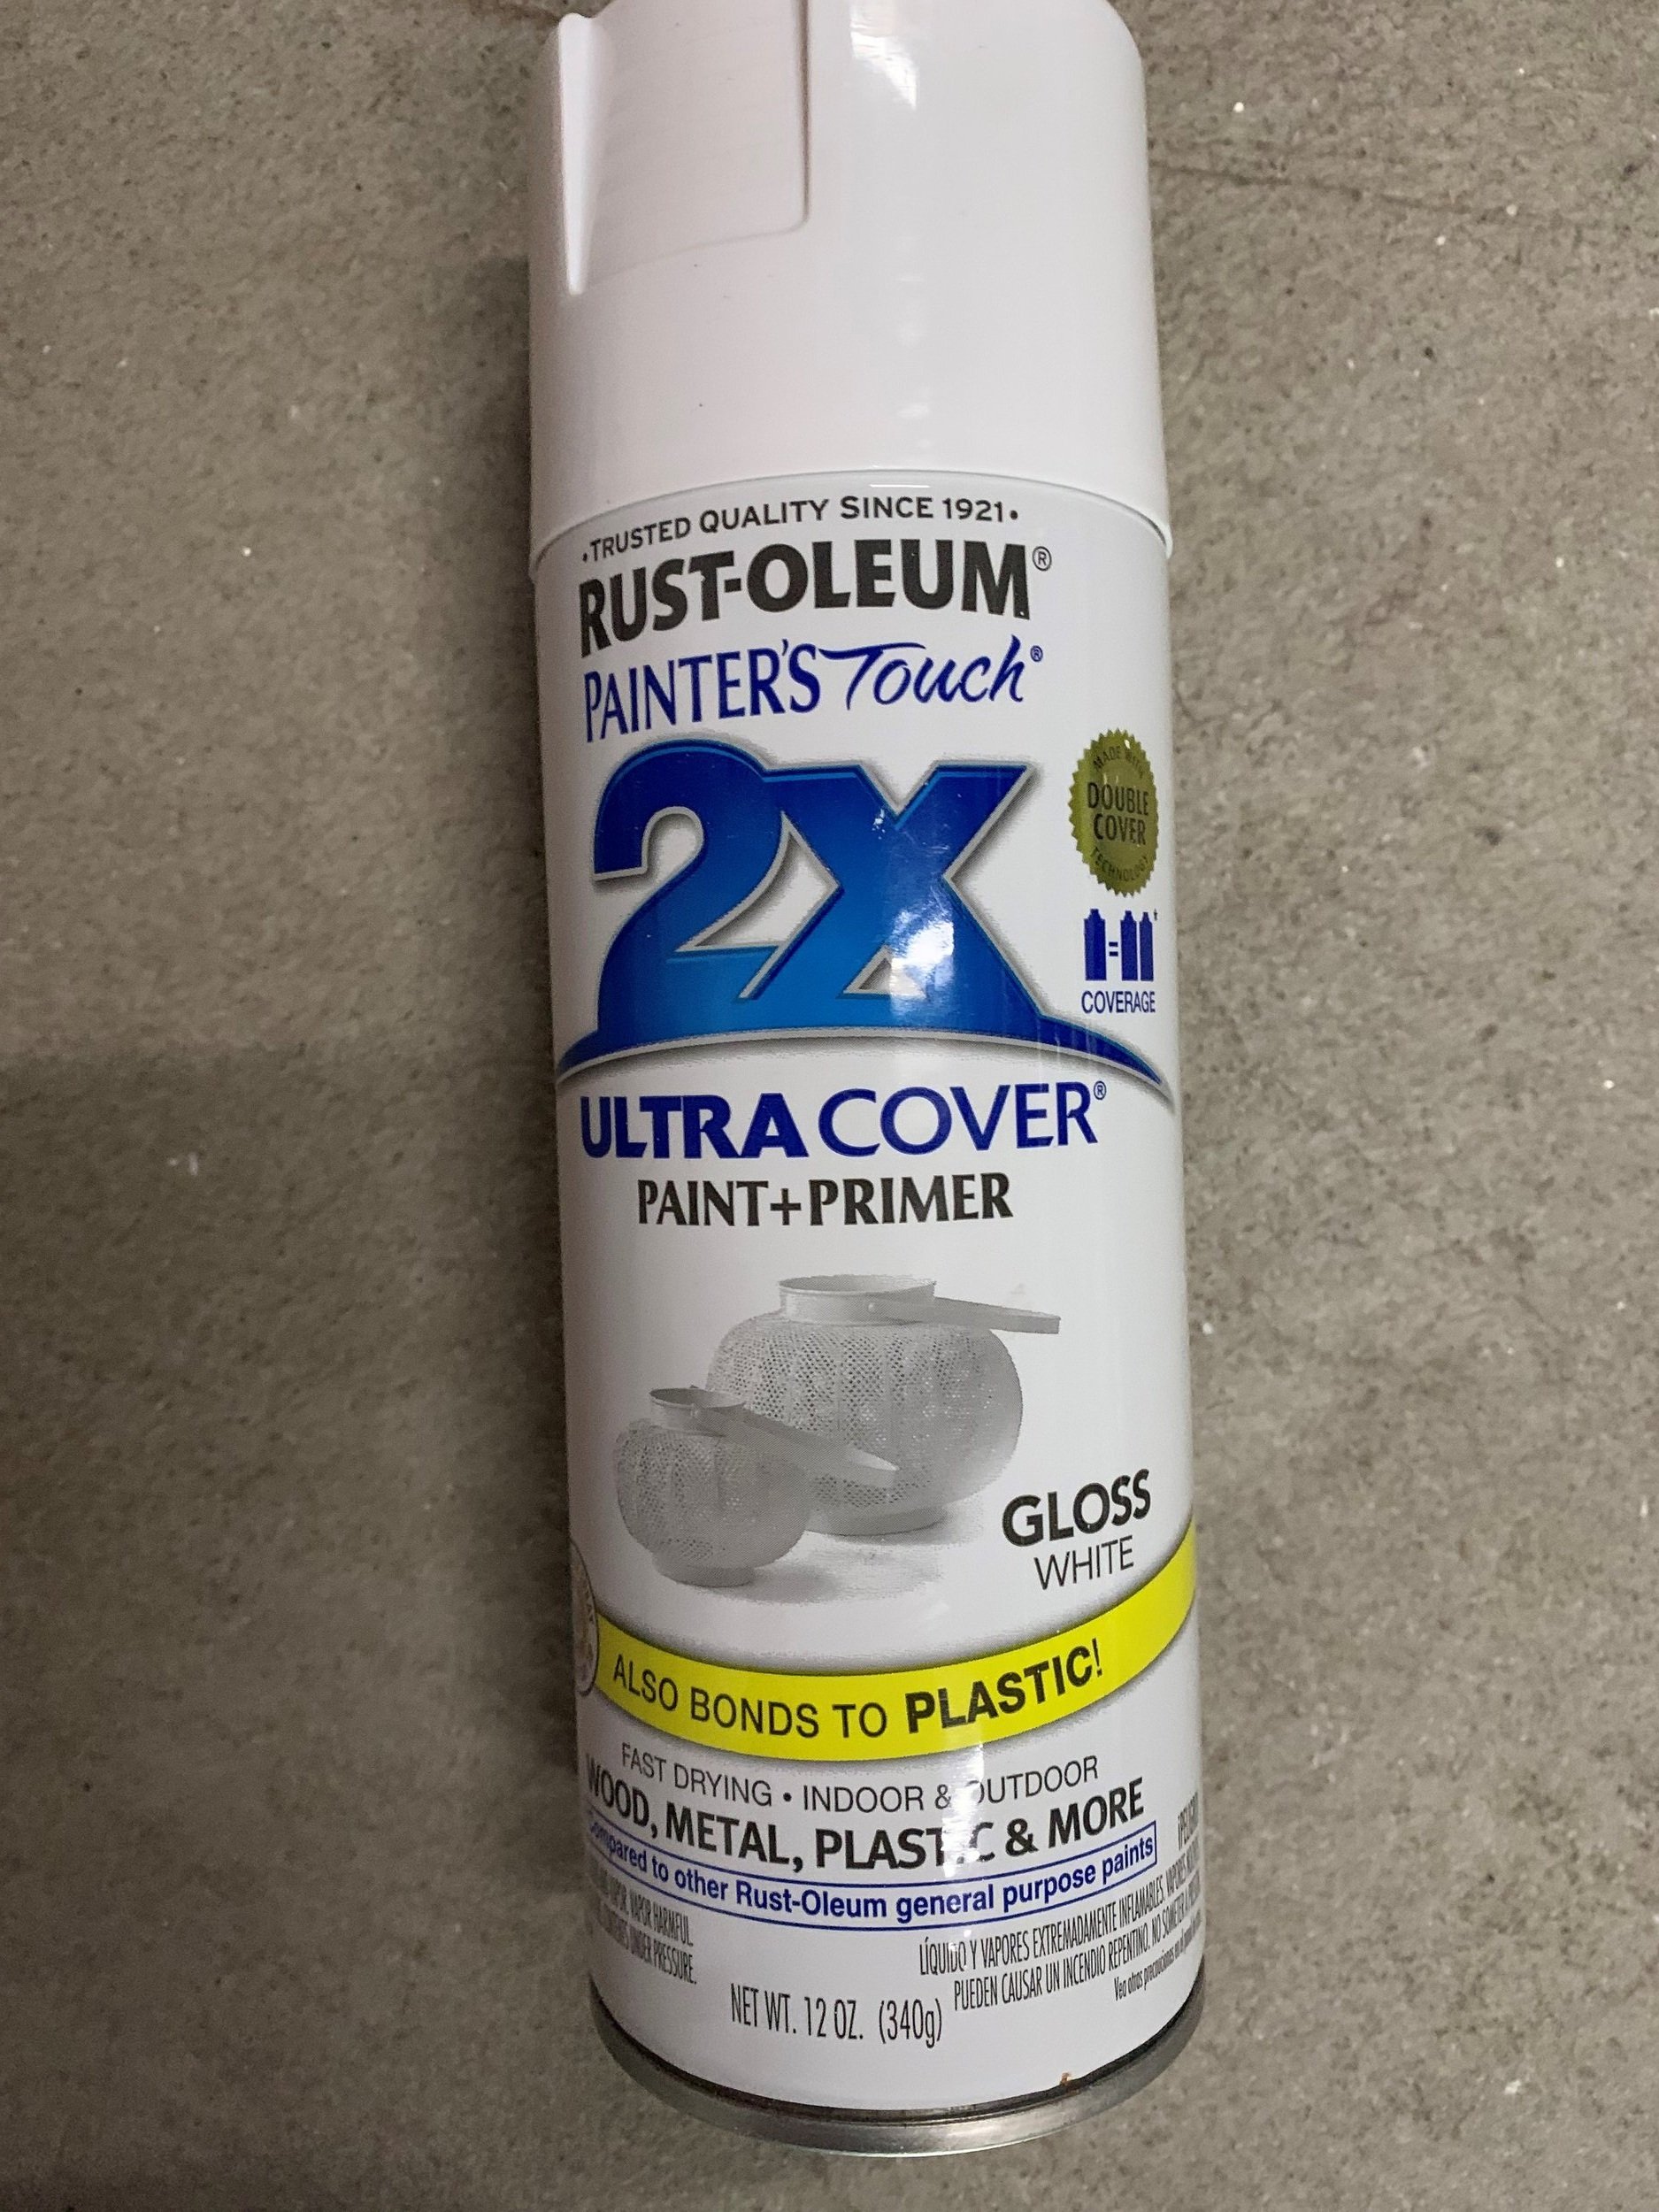
Mix the paint (and thinner if appropriate) per the manufacturer’s instructions. Using a bristle or foam brush, apply paint in light coats starting with the edges of the blade, making sure to smooth excess paint on both blade surfaces. Start at one end of the blade surface and apply the paint in smooth, even strokes. Allow the paint to dry per the manufacturer’s instructions before recoating to your desired finish. Note: One coat will not provide good results. We recommend lightly applying multiple coats. Applying thick coats may produce paint runs and improper curing.
Step 2: Wait for the White Paint to Dry
Read the directions on your paint can to determine the wait time. If possible, wait 24 hours. Drying on a flat level surface is essential. Do not dry with your oar blades sticking up to the sky.
Step 3: Taping and Painting Blue Stripes
(1.5-2 hrs) Consider using a set of club oars as a visual reference


The stripes are achieved by using blue painters’ tape. (sculling blades should use 1.41″ stripes) In hardware stores, look for the blue painters’ tape in rolls that are labeled exactly as such. Be sure that you have properly prepared your blades per Concept 2’s instructions found above. This includes sanding the blades with 220-grit sandpaper, painting them white, and allowing them to fully dry before beginning to stripe them with the painters’ tape. Note: Even if you are striping brand new (i.e. already white) blades, it’s important to still sand and prime them, otherwise the blue paint will not stick to the oars.
After your coat of white paint has dried, use your painter’s tape to create your stripes. Beginning at the outer edge of the blade (opposite the end that meets the shaft), place a strip of tape that runs along the edge of the blade. Flip the blade over and do the same to the other side. Stripes should be parallel to the end of the blade, rather than perpendicular to the shaft. The edge of the blade should always start with a blue stripe.
If the blade has a vortex edge, you should still measure from the end of the blade (rather than from the vortex edge). In other words, the vortex edge should be included within the blue stripe. Important: Do not paint the vortex.
Continue placing strips of tape side-by-side until the entire oar is covered. Strips of tape should be placed flush against each other to guarantee straight, even stripes.
The bottom edge (edge away from shaft) of the blade should always start with a blue stripe, so once the oar is covered in tape, remove the strip on the end of the blade first (to reveal the white), and then remove alternating strips of tape (revealing additional white stripes, so the blades are now alternating blue and white). Reminder: Don’t paint the vortex edge of the blade, if you have one. Re-tape the vortex edge after removing the full strip of tape if necessary.Every stripe should be the same width. The final stripe (closest to the handle) may be blue or white, depending on the overall length of the blade. Also, the final stripe may be narrower than the others. But do not allow the final stripe to be noticeably wider than the others, or the paint job will look unfinished.
Use several light coats of blue spray paint to create the stripes, following the instructions given on your paint in regards to the timing of the coats.
Step 4: Wait for the Blue Paint to Dry
Read the directions on your paint can to determine the wait time (recommended wait time: 24 hours). Drying on a flat level surface is essential. Do not dry with your oar blades sticking up to the sky.
Step 5: Clear Coat Finish
Be sure to follow up with a coat of protective clear coat to preserve the stripes for as long as possible.
Quick links
Read through the entire set of directions before starting.
Priming, Sanding, and Painting White (1.5-2 hrs)
Drying the White Paint (24 hrs)
Taping and Painting Blue Stripes (1.5-2 hrs)
Drying the Blue Paint (24 hrs)
Supplies Needed
The distinctive Riverside blades have blue and white stripes. The recommended color is Rustoleum Deep Blue.
- Gray spray primer
- 220 grit paper and soft sanding block
- Rubbing alcohol
- Lint-free cloth
- Rustoleum white gloss spray paint
- Blue painter's tape
- Sweep Oars:1.88 inch
- Sculling Oars: 1.41 inch
- Rustoleum Deep Blue gloss spray paint
- Clear coat spray paint